Upload files to a Space
To upload files to a Mempipe Space, open Files and choose Upload file, or drag files or whole folders from your computer into the file list. You can upload any type of file. After upload, Mempipe processes PDF and Markdown files so you can read and search them, and CSV and TSV files so you can open and query them as tables.
Before you start
Section titled “Before you start”- Open the Space you want to add files to. To make a new one, see Create and switch organizations and Spaces.
- Check the file size. Each file can be up to 32 MB on the Free plan and up to 64 MB on Starter. See plans, usage limits, and upgrading, or compare plans and prices.
Upload files
Section titled “Upload files”-
Open Files.
Choose Files in the narrow rail on the left of the Space. The file list shows your folders and files. Find your way around a Space shows where each panel is.
-
Choose where the files go.
Select a folder in the list to upload into it. If a file is selected, the upload goes into that file’s folder. With nothing selected, files go to the top level of the Space.
-
Upload.
Choose Upload file, the upload arrow at the top of Files, and pick one or more files. Or drag files from your computer into the list:
- Drop them on a folder to upload into that folder. To reach a folder inside it, hold the files over the closed folder until it opens.
- Drop them on an empty part of the list to upload to the top level. The list shows Drop to upload to root.
To upload a whole folder, drag it into the list. Mempipe creates the same subfolders in the Space. Upload file picks files only, not folders.
-
Watch the upload panel.
A panel in the bottom-right corner lists each file as it uploads, with a progress bar for large files. When every file has finished, its header sums up the result, such as 3 uploaded. Choose Clear to close the panel. The arrow at the left of the header folds the panel down to that line, and the × beside a finished file removes it from the list.
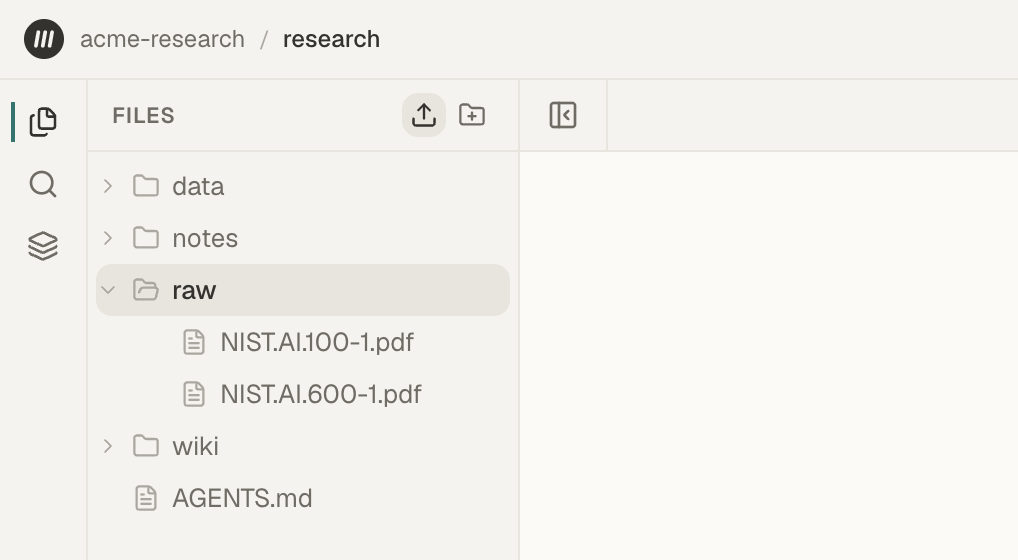
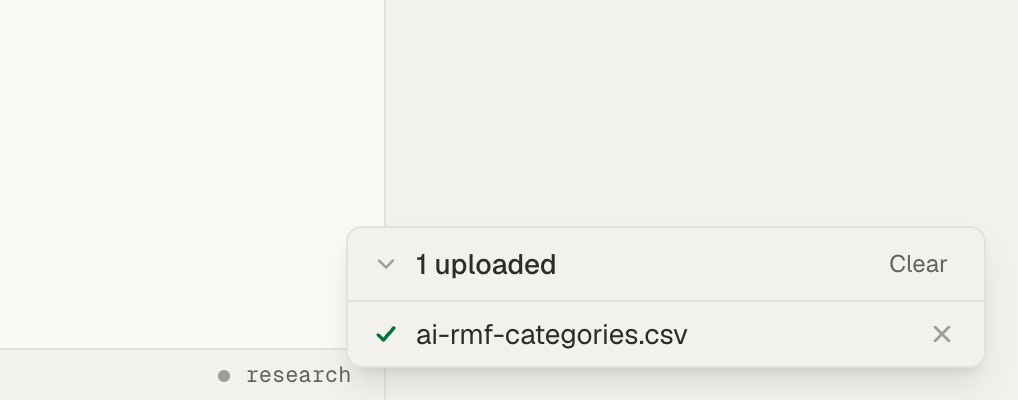
Each file you uploaded now appears in Files. A PDF, Markdown, CSV, or TSV file shows Deriving… beside its name while Mempipe processes it, then Ready. What happens after you upload a file explains what processing does.
Upload into an empty Space
Section titled “Upload into an empty Space”A new Space shows a large drop area that says Drag a PDF or Markdown file here to start. Drop files or folders on it, or click it to pick files. Files uploaded here go to the top level of the Space.
When a file with the same name exists
Section titled “When a file with the same name exists”If a file you upload has the same name as a file already in that folder, Mempipe asks before changing anything. The dialog names the file, such as “NIST.AI.100-1.pdf” already exists, or counts the files when several match.
- Replace updates the existing file with the one you uploaded. It keeps its place, and Mempipe processes the new content.
- Skip it, or Skip existing for several files, leaves the existing files unchanged.
- Cancel stops the whole upload. Nothing is uploaded.
With Replace or Skip, the other files in the same upload that have new names upload as usual. A file with the same name as a folder is always skipped.
Which files you can upload
Section titled “Which files you can upload”You can upload any file, but only some are processed:
- PDF files get a markdown view of their text, and Markdown (
.md,.markdown) files a reading view. Both are included in search. - CSV and TSV files open as tables you can sort, filter, and query with SQL. They are not included in search.
- Other text files, such as
.txt,.json, or.yaml, open in a text editor. - Files Mempipe can’t display, such as images, are stored and listed. Opening one shows No preview available for this file type.
Besides the per-file size, your organization’s plan limits total storage and the number of files and folders. Every folder counts, including the folders a folder upload creates. See supported file types and size limits.
If an upload fails
Section titled “If an upload fails”The upload panel shows why a file failed. When a new file goes over a plan limit, a notice at the bottom of the panel usually explains it. Other reasons appear under the file’s name, and so does a plan limit in two cases:
- You replace a file. The reason reads like 40 MB exceeds the 32 MB per-file limit on this plan.
- A folder upload can’t create one of its folders, for example because of the files and folders limit. The files meant for that folder show a message such as Could not prepare the destination folder.
Reasons you may see:
- File too large for this plan. The file is over your plan’s per-file limit. Upload a smaller file, or upgrade your plan.
- Not enough storage or You’ve reached the files and folders limit. Delete files or folders you no longer need, or upgrade. Deletions can take a moment to be counted, so wait a moment before you try the upload again. See You reached a storage, file, or Space limit.
- …the maximum upload size is 128.0 MiB. No plan accepts a larger file. Split or compress the file first.
A file that failed can stay in Files marked Failed. Choose Delete on that row to remove it, then upload the file again.